


Video. It’s more important than ever.
Producing great video used to be a luxury for businesses. But more and more, it’s becoming a requirement to capture attention and engage your audience.
For some people, though, the thought of putting together a video studio sounds daunting. You might think a video studio has to cost tens of thousands of dollars and look something like this:
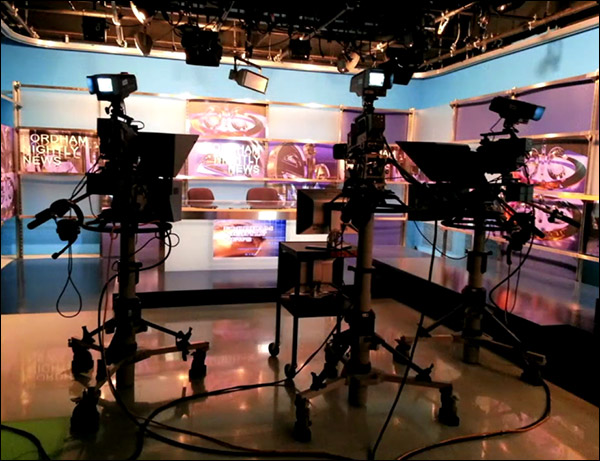
This is a news-station-worthy studio. It’s not that far off from what we have at the DigitalMarketer office right now.
But we didn’t always have such an elaborate setup.
When we got started, our studio was much simpler and much less expensive—but it still worked great for our needs. It looked more like this:
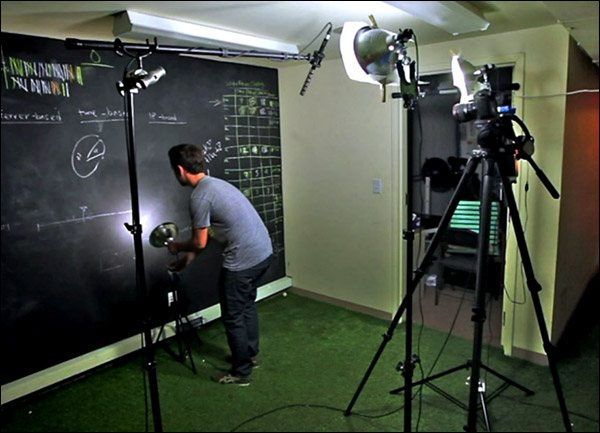
Thanks to some amazing improvements in camera technology over the past ten years or so, you don’t need as much equipment as you might think. And you don’t need to spend as much money as you might think, either.
You can put together a studio like this without spending a lot of money. And you’ll still have the ability to record and livestream high-quality video with crystal-clear audio.
And in this post, you’re going to learn how to do just that.
By the time you’re done reading, you’ll have a step-by-step roadmap for creating your own video studio to film your content.
You can put together a studio like this without spending a lot of money.
You’ll start with a simple studio put together on a shoestring budget, so you can get started right away. And you’ll learn how to upgrade to a pro-level studio with high-resolution, multiple angles, and professional audio and lighting.
But before we dive into the details of what you need to buy, I want to cover three important requirements when building a video studio.
Follow these three tips to help make sure you don’t waste your money on pieces of equipment that are incompatible or unnecessary.
How to Create a Video Studio Requirement #1: Get Equipment That Makes Sense Together
Some people will go out and start buying one-off pieces of equipment that someone told them they “had to have.”
Some super expensive wireless Lav microphone or a $3,000 lens that Zeiss just released.
 The problem with this is that there are a million different “tools” to choose from in video production, and what is right for one shoot could be terrible on another. Sometimes the
equipment you get might not actually be compatible together or make sense when you try to make them all work together as one integrated system.
You could end up with the equivalent of two Lego blocks and three Lincoln Logs. In other words, not enough compatible pieces of equipment to make a complete studio.
So, when I recommend things in this post, I’m going to steer you toward pieces of video equipment that build on one another. That work together.
So that when you decide to upgrade one piece of equipment, it will fit in seamlessly with everything else you already have.
How to Create a Video Studio Requirement #2: Make It Easy to Livestream
As video and video marketing continue to evolve and get better, one thing is pretty clear:
Livestream is becoming more and more important. (Especially on Facebook.)
Remember, you can always repurpose livestream videos for other platforms.
Unfortunately, many cameras don’t integrate well with this technology. And if you don’t know what you’re doing, you might end up with an expensive camera that can’t even livestream.
(At least, not unless you buy an even more expensive and complicated converter system.)
But if you follow the advice in this post, and start with livestream in mind, you won’t have to worry about that.
Remember, you can always repurpose livestream videos for other platforms:
- You can do a livestream on Facebook, then upload the resulting video to YouTube
- You can strip out the audio for a podcast
- Finally, you can break up the video into several parts and have each of them transcribed into blog posts
But the same thing is not true in the other direction. You can’t turn a blog post, podcast, or MP4 into a livestream. So that’s why we’re starting with livestream capability in mind.
How to Create a Video Studio Requirement #3: Get Your Priorities Straight
This last requirement is all about upgrading your equipment in the right order. And what you’re about to learn here might be a little surprising.
When setting up a video studio, most people tend to assume that the most important piece of equipment they need is a great camera.
Right?
Actually, wrong. And here’s why:
And instead of buying a camera first, you should invest in getting better audio.
These days, most people already HAVE a great camera. And that includes you. It’s probably in your pocket or sitting on your desk or maybe it fell through the space between the center console and the driver’s seat in your car.
I’m talking about your smartphone.
These days, phones have GREAT cameras. Especially newer iPhones and Samsungs. Sure, they may not be the absolute best cameras ever…but for what most people need, they’re plenty powerful.
So, when you’re first getting started, I recommend using your smartphone. And instead of buying a camera first, you should invest in getting better audio.
Why audio?
Think about it. Most people will put up with footage that is slightly grainy. (Heck, Blair Witch Project looked terrible and it still made $248.6 million at the box office.)
But nobody is willing to put up with bad audio.
If people can’t understand you, they’re going to close out your video. Fast.
So overall, here’s the priority order that I recommend when buying equipment for your video studio:
- Invest in better audio. I recommend going up to the entry-level equipment described below.
- Next, upgrade your video up to the entry-level equipment described below. (Don’t go any higher than that for now because a pro-level camera will be much more expensive and complicated to set up.)
- Then work on getting better lighting and improving your backdrop.
Follow this advice and you’ll be working toward a video studio that gives you the absolute best bang for your buck. You’ll have solid video and audio, and you’ll also keep everything as simple as possible to set up and use.
OK, now that we’ve got that out of the way, let’s dig into the specific pieces of equipment that will make up your video studio.
Audio Equipment
As I mentioned above, audio should be your top priority when setting up a studio.
It’s vital that your audio is LOUD, clear, and easy to understand!
When we talk about audio equipment, we’re mostly talking about microphones. And there are several kinds of them—lavaliers, shotgun mics, podcasting microphones, and so on.
We’ll also be talking a little bit about using a mini-audio mixer, which may be necessary depending on what type of camera you’re using. The mixer acts as a preamp and provides phantom power to your mic when you need it.
Shoestring-Level Audio Equipment
If you’re just getting started with your studio (AKA your only equipment is a smartphone), the first thing you buy should be the Saromonic SmartRig+ ($100 at the time of this posting).
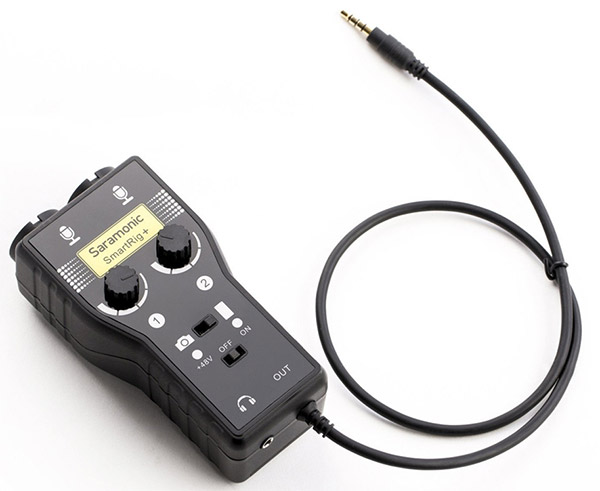
Source: Amazon
This little guy is a game-changer. It’s a lynchpin piece of equipment that will play a critical role in your studio.
No matter which level of audio equipment you choose—shoestring, entry-level, or pro-level—you will need the SmartRig+.
If you’ve ever tried plugging a professional microphone (like a lavalier) right into your phone, you probably realized it doesn’t work very well. That’s because professional audio uses TRS inputs, but your phone uses TRRS.
The SmartRig+ fixes that.
Simply plug the SmartRig+ into your phone and it will convert the audio into a format your phone can understand and process. But you don’t have to use a smartphone; you can also use the SmartRig+ with other cameras, like DSLRs.
(If you look at the switch in the middle of the device, you can see how easy it is to go back and forth between the two.)
What makes this device so magical is the multiple inputs (two XLR inputs, two TRS ¼” inputs, and two TRS 3.5mm inputs). Which means you can plug any microphone—from lavaliers to more expensive shotgun mics—into any camera you want.
And when you’re just getting started, I recommend getting a Saromonic SmartRig+ and using it to plug a Giant Squid Lavalier Mic ($50 at the time of this posting) into your phone.
Here’s what the Giant Squid looks like:
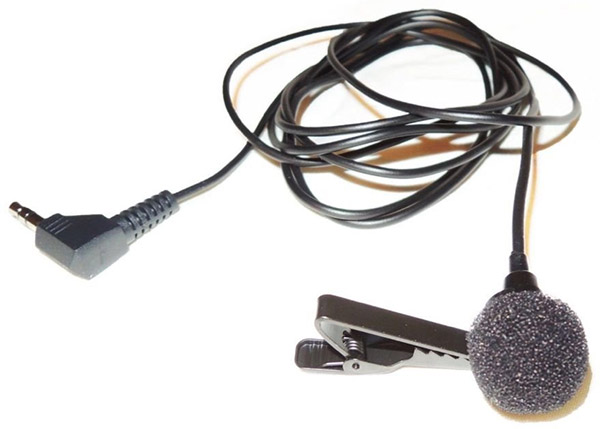
Source: Amazon
In case you don’t know, a lavalier microphone is a small mic that you clip onto your shirt. It produces clear, loud audio and also gives you the freedom to move around. It’s perfect for head-on video, which is what most people are shooting.
The Giant Squid is a wired lavalier, which means it has to plug directly into the SmartRig+. So, depending on how far you want to stand from the camera, you might need to grab a 3.5mm auxiliary cable extension. And for around $5, that will give you more range to walk around.
With those two pieces of equipment recommended above, you can get professional-sounding audio for about $150.
Entry-Level Audio Equipment
The only downside to a lavalier like the Giant Squid is that it’s wired. Which means you’re physically connected to the camera.
Even if you get the extension cable, like I recommended, it can still be a little awkward. You have to watch where the cable is so you don’t trip over it, and you have to wire it through your clothes if you don’t want it showing in the video.
Or, you can bypass those issues by upgrading to the entry-level audio equipment…the RodeLink Lav System:

Source: Amazon
This is quite a bit more money ($400 at publication), but it’s wireless—which means you don’t have to be physically connected to the camera. Instead just clip the RodeLink on the back of your belt, and it wirelessly transmits your audio to the SmartRig+.
Now you have the freedom to walk around anywhere, with no wires in the way. Great for live events.
(Note: you can definitely buy a wireless system for under $400…but I don’t recommend it. If you try to use anything less than the RodeLink, there’s a good chance you’ll run into quality and connection issues.)
Pro-Level Audio Equipment
Finally, if you want to kick your audio game up a notch, you’re going to want a Rode NTG3 Shotgun Mic. Here’s what it looks like:
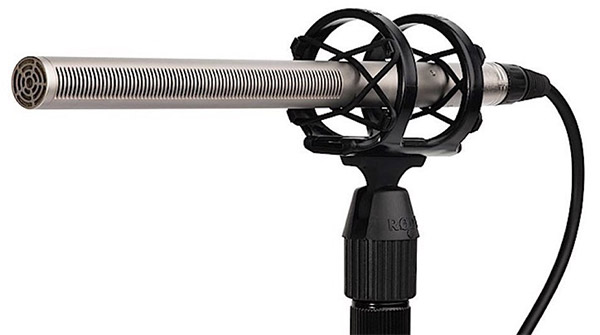
Source: Amazon
For around $800, this is mic has amazing sound quality. It does something most mics don’t do, which is capture the full spectrum of the human voice.
Now, if you’re shooting inside in a quiet location, all you need is the mic itself. If you plan on shooting outdoors, you’re going to need some wind protection.
Ever had a hard time understanding someone on a phone call because it was windy outside? Yeah. Wind is killer for mics.
Windshields for shotgun mics are big and fuzzy and look like this:
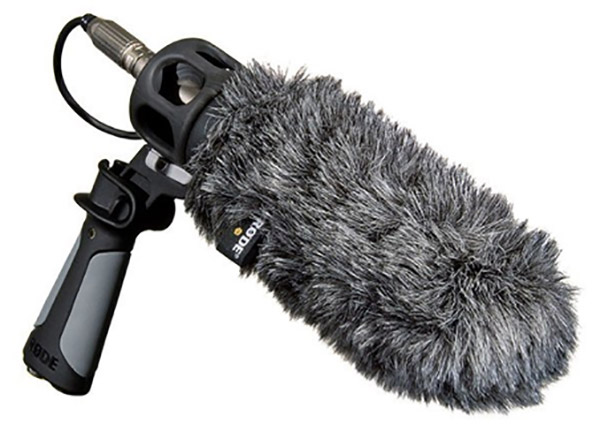
Source: Amazon
And the awesome thing is that this mic—which is as pro as pro gets—still plugs right back into that SmartRig+.
Video Equipment
We’re talking about videos here, so obviously you need something to…you know…shoot video! 🙂
There are a lot of cameras out there.
It’s easy to get overwhelmed and spend a ton of money on something that’s much more powerful than you need. (Not to mention way too complicated for you to actually use).
So, to keep things as simple and easy as possible while still giving you excellent video quality, I’m going to recommend these three cameras:
Shoestring-Level Video Equipment
I talked about this a little earlier. Chances are good that you already have a powerful camera—it’s called your smartphone.
These phone cameras have gotten REALLY good lately. (Especially iPhones and Samsungs.)
They’re mobile, they can shoot in 4k, they have cool features like slow-mo, and they integrate seamlessly with livestream.
So, when you’re getting started, just use your phone. Seriously. It’s a good camera.
You would have to spend at least $400-$600 for it to even begin to make sense to buy another camera.
Entry-Level Video Equipment
When you’re ready to move up from shooting with your smartphone, there are so many options that it can be overwhelming.
Should you get a DSLR? Digital camcorder?
Do you need HD, 4K, WiFi?
What I recommend is something called the Mevo ($500 at publishing):
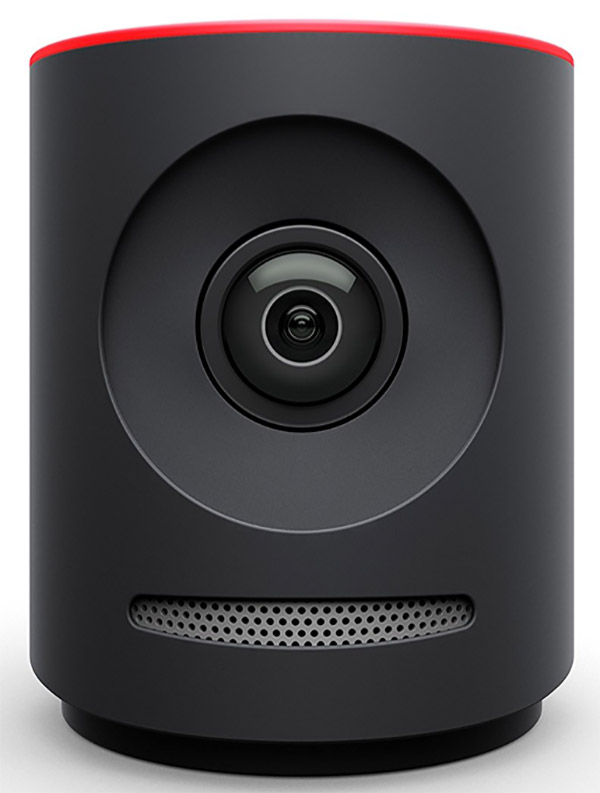
Source: Amazon
The Mevo was made for filming live events, which means it’s perfect for livestreaming. (Compared to that, it is much more expensive—and complicated—to set up livestream with a DSLR.)
What I love about this device is the Mevo app, which allows you to do some awesome things. It turns your phone into a switchboard, allowing you to switch from one angle to another, do wider or tighter shots, zoom in or out, and so on.
The way this works is pretty cool. And it even has auto-switching capabilities, though I recommend having someone actually manning the operation.
Basically, the Mevo is a 4k camera that outputs 1080p video. As a result, it’s able to choose different parts of that 4k video to output as different camera angles.
So, why is that a big deal?
Because it allows you to do all this stuff LIVE.
Normally, if you wanted to broadcast live video and change angles you would have to use multiple cameras and then splice the shots together in a switcher that typically starts at around $5,000 and requires a lot of skill and engineering to work.
The Mevo lets you do it all live, which not only allows you to produce better live video…it also helps cut out the entire editing post-production process. And that makes it a major time-saver.
You can even just record your video while live switching creating a multicam edit in real time.
If you are set on creating Livestream productions you should upgrade your Mevo with the Boost, which gives you more power and a hardwired internet connection. (Hardwired internet can really improve your livestreaming video quality).
Here’s what the Mevo Boost ($250 at publication) looks like:
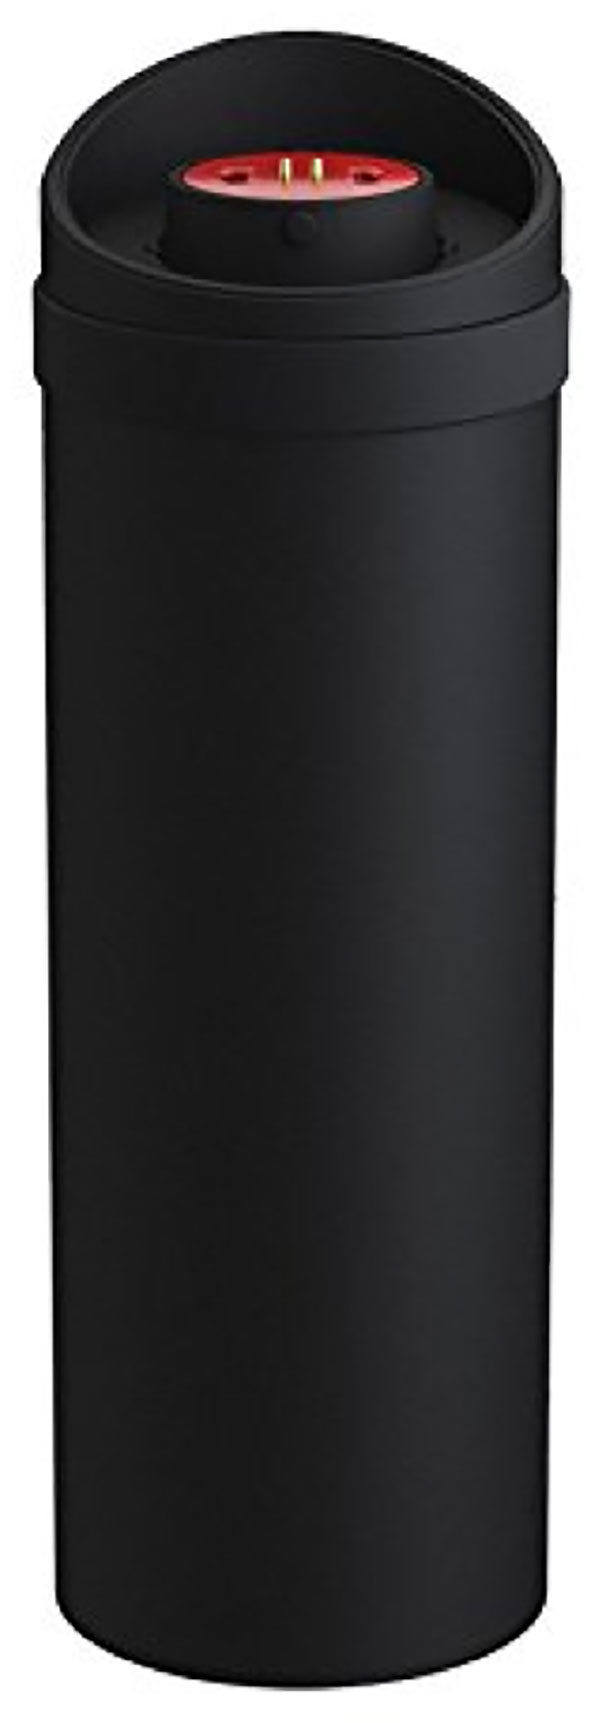
Source: Amazon
Pro-Level Video Equipment
When you’re ready to upgrade from the Mevo, it’s time to make the leap to DSLR.
A DSLR is going to be more expensive and complicated to set up and use, but the benefit is that you get an amazingly sharp video.
The DSLR I recommend is the Lumix GH5:
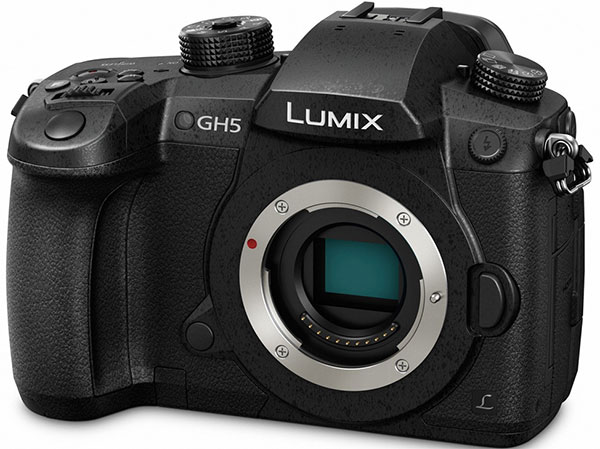
Source: Amazon
This is a $2,000+ camera. It’s a lot more expensive than the previous options, but it’s not that bad for how good this camera is. Ten years ago, a camera with this much power would cost $500k.
One awesome thing about DSLRs is how versatile they can be. Because you can use different lenses, you can go all the way from super wide angles to extremely tight shots. But this also means you’ll need to invest in a lens or two, and those aren’t cheap.
If you buy your GH5 with a lens, you have some options, the best combo is with a 12-35mm lumix GX Vario lumix/panasonic lens. If you want to shoot tighter shots, or need to shoot from a distance, I also recommend investing in a 35-100mm lumix GX Vario lumix/panasonic lens:
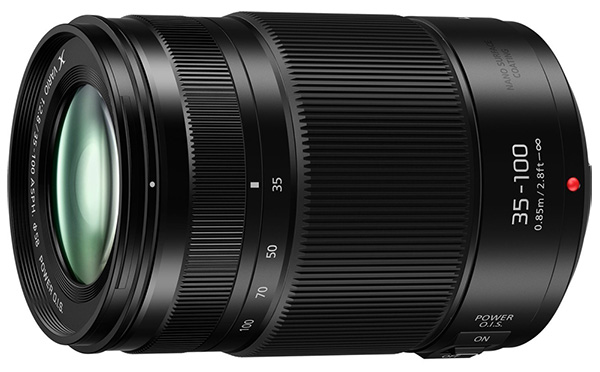
Source: Amazon
With those two lenses, you’ll be able to handle just about any type of shot you want.
The upside of this equipment is that you can produce fantastically sharp video. But there’s a downside, too.
The downside is that you’re now shooting your video onto a memory card. There’s no more linking to your phone, no more seamless livestream integration.
If you want to livestream with a DSLR, you’re going to have to make a significant investment in a system like the SlingStudio, Blackmagic Web Presenter system with OBS studio, or even go all the way to the Livestream HD550. The most reliable of which, can run upwards of $10,000 and is amazingly more difficult to set up, and I don’t recommend this unless you have someone with a degree or many YEARS in video production working with you.
Long story short: even if you want to get yourself a GH5 for any non-live videos, you’re probably better off using a Mevo for livestreams.
Lighting/Backdrop Equipment
Lighting and backdrop are critical in video marketing and production. Good lighting can mean the difference between a pretty bad-looking video and a really good-looking one.
Your backdrop is equally important because whatever you have in the background of your video is going to say something about you.
For example, shooting videos in your kitchen will work for a chef…but not for a marketing expert. Shooting videos of you sitting at a desk will work for an author…but not so much for a weight-loss trainer.
So, that’s why, when we get to the entry-level equipment in this category, I recommend getting a more professional-looking backdrop. One that will look good no matter what industry you’re in or what time of day it is.
Shoestring-Level Lighting/Backdrop
The shoestring-level lighting and backdrop is simple:
Just choose a spot with good natural lighting and a nice-looking backdrop. No special equipment necessary.
Here are a few tips to help you do that:
- You’ll want to place the camera in front of a window, so that you (or whoever is the subject of the video) is looking toward the window. Don’t stand with your back to the window—that will give terrible lighting.
- You want to use a window with good natural lighting, but not direct sunlight (which is too harsh).
- Choose a nice-looking backdrop like a bookshelf or an environment that your viewer would expect to see you in, that “reads right” to the audience.
- Keep in mind, your lighting will shift slightly over time as the sun moves. It’s not a huge deal, but it’s something to consider.
This is going to vary quite a bit from person to person. Maybe your home or office has the perfect spot for shooting videos—in which case, you might not need anything else!
But most people are probably going to want to upgrade their lighting and backdrop. Here’s how to do it.
Entry-Level Lighting/Backdrop
The first thing you should focus on is getting a more professional-looking backdrop. I recommend white because it looks clean, professional. It’s like a blank slate.
There are two ways to do it. You can either get a fabric or paper backdrop, like this:
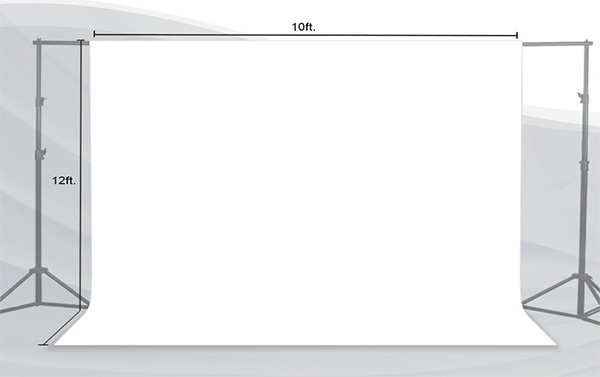
Source: Amazon
Hint: Seamless Paper looks better and is easier to use but will need to be replaced constantly.
Basically, you put up two stands and a pole connects them at the top. Then you hang the paper roll or fabric down from the pole, and voila!
White backdrop.
Another way to do this is with a pop-up backdrop, like this:
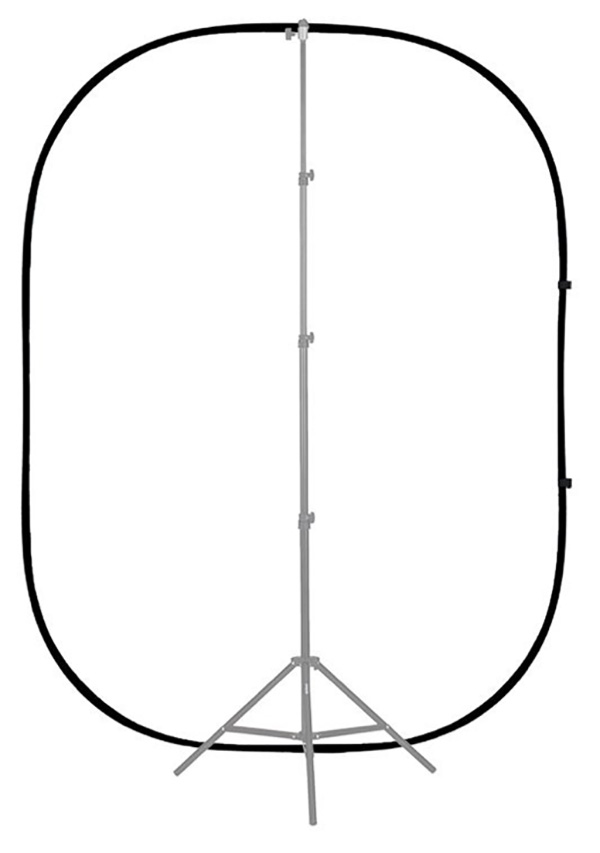
Source: Amazon
This backdrop is a little smaller (you won’t be able to move around much), but it’s quicker and simpler to set up. Just unfold it and hang it from a stand, clamp it to a bookshelf, or even lean it up against a wall.
Often these pop-up backdrops have a different color on each side, so you can have one white and one black, for example. You can even get a green screen if you want to add a custom background in editing.
It’s up to you which of these backdrops makes more sense. The seamless paper or fabric version gives you a pretty big area, so you can move around a little or have more than one person in the shot. The pop-up backdrop is quick, easy, and portable, but is only big enough for one person.
They both work, and they’re both pretty cheap. You can get one of these setups for $50-$100 on Amazon.
Now that you’ve upgraded your backdrop, the next step is to get some better lighting. And you don’t have to spend a lot of money here, either.
The easiest thing is to buy some clamp lights ($15 at publication):
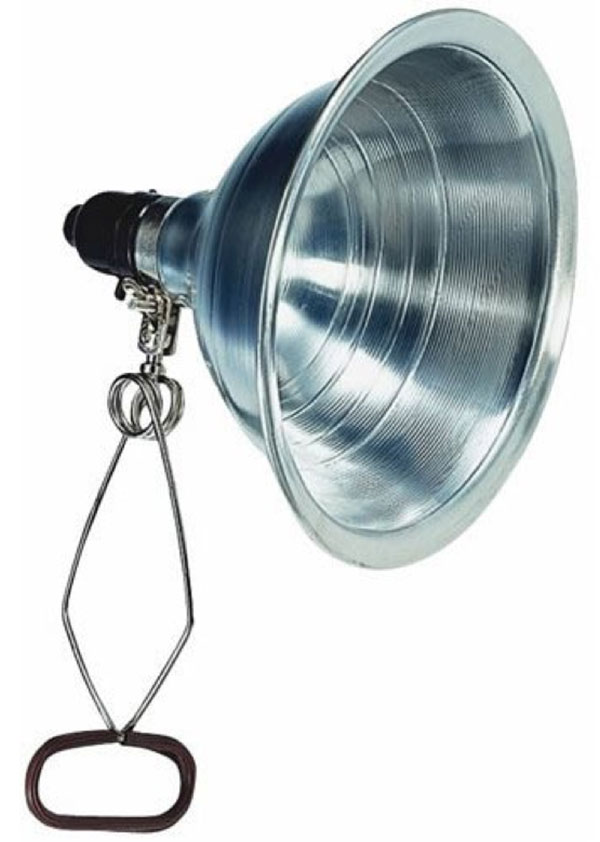
Source: Amazon
Then clamp on with some diffusion gel—which is a kind of paper that spreads and softens the light, eliminating harsh shadows.
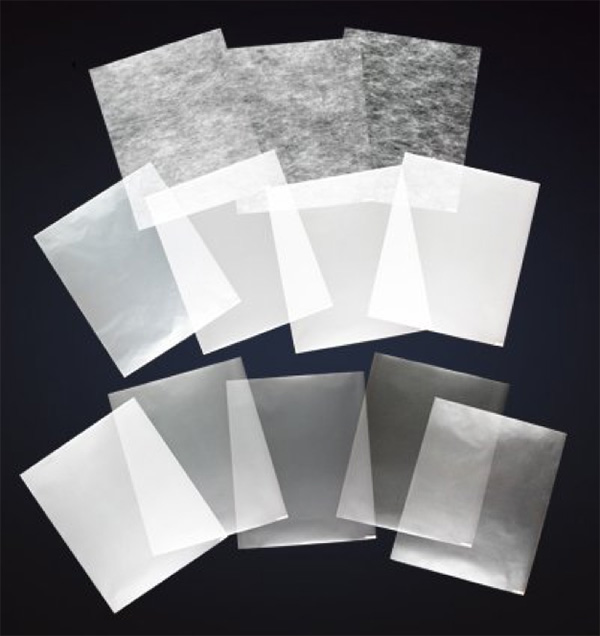
Source: Amazon
Hint: These lights can get hot enough to melt plastic, so clamp the paper using a wood clothespin.
Pro-Level Lighting/Backdrop
If you want to really step up your lighting game, the last thing I recommend is a few LED lighting panels with high CRI.
This will replace those clamp lights and give you the full spectrum of light.
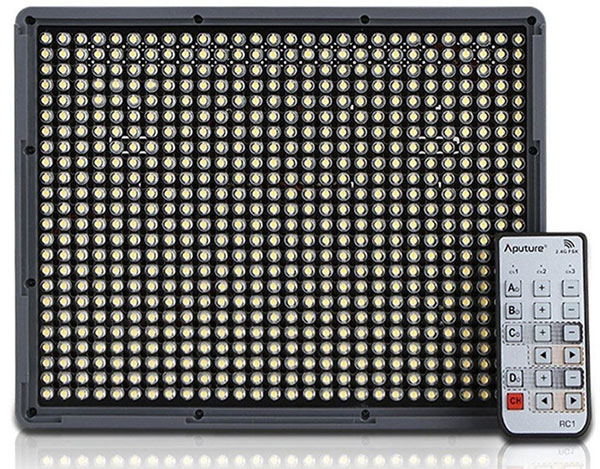
Source: Amazon
These are great lights. They are super easy to operate, they don’t get hot, and they provide a large surface area of light. The light they cast is daylight temperature (5,500K), and matches well with ambient window lighting, but you can get variable color temperature versions for a little bit more money.
You can adjust these lights to be brighter or softer to match the needs of your studio. The key to any LED lights for video production is a HIGH CRI 95+ is great, anything below that and you will actually be missing a lot of light information that the eye (and cameras) needs to distinguish color.
3 Quick Lighting Tips
While we’re on the subject, here are three easy things you can do to improve the lighting in your studio:
1. Don’t turn on overhead lights. This will make your eyes look dark.
2. The simplest lighting is put two lights on your subject, one on each side, each at a 45° angle. It’s important to keep the lighting even so you don’t create harsh shadows on one side of your subject’s face.
Hint: If you are wanting to get real professional with lighting your subject Google three-point lighting, the backlight really helps your subject become the focal point and stand out from the background
3. Don’t stand too close to the backdrop. Otherwise, you’ll throw a shadow on it, which can be distracting. Sometime the background will need a little extra light, place lights out of the shot, light from the ground or the ceiling.
Editing Software
Once you get your studio set up, shooting videos can be a lot of fun.
Editing them, on the other hand, gets tedious quick. It’s easy to get bogged down when editing a video (especially if you don’t already know how to use the software).
That’s why I recommend shooting your videos in a way that reduces or even eliminates the need for editing. Like we talked about above, you can use the Mevo to change angles to edit while you’re shooting.
Another option is to find a good video editor to outsource your editing to. Freelancing sites like, Fiverr, Upwork, or Staff Me Up will have all kinds of good video editors for hire.
But for those times when you do need to do some editing, and if you want to do it yourself, here are the programs I recommend.
Entry-Level Editing Software for PCs
Windows Movie Maker is free…and terrible. Please, please don’t use it.
Instead, try Adobe Premiere Essentials. It’s a cheaper version of Adobe Premiere, with a simplified interface.
The benefit of the simplified interface is that it’s easier to use. The downside is that if you ever decide to upgrade to Adobe Premiere, you’ll have to completely relearn how to use the software.
Pro-Level Editing Software for PCs
If you’re running a PC, Adobe Premier is hands down the choice for professional editing. It’s a powerful, professional-level system that gives you all the editing tools you’ll ever need and more, while integrating with their other creative cloud programs.
Entry-Level Editing Software for Macs
I love and recommend iMovie. It is amazingly powerful, gives you a great collection of tools and comes free with all new Macs.
Pro-Level Editing Software for Macs
When you’re ready to progress beyond iMovie, I recommend Final Cut. It has a very similar interface to iMovie, so the transition will be pretty seamless. You’ll be able to hit the ground running without having to relearn everything.
Final Cut has tons of powerful tools, great project management, and their multi-cam editing is unparalleled.
Screen Capture Software
You’ve probably seen us do videos that record what’s on our screen and turn it into a video. You can do the same thing pretty easily. The screen capture programs you’ll want to use are:
- Camtasia Studio for Windows
- Screenflow for Macs
Screen capture is awesome for giving a first-person point of view of your computer screen. Perfect for showing people how to use programs or software. You can also create PowerPoint presentations and go through them using screen capture.
Now Go Start Your Video Studio
Phew, we covered a lot of ground in this post. If you’re feeling a little overwhelmed, I want you to remember what I said earlier about priorities.
Follow my suggestions and get started with the bare minimum equipment:
Film with your smartphone and a Lavalier microphone, and stand in a spot with good natural lighting.
What you DON’T want to do is go spend a lot of money on equipment that is too complicated. Because then the technical side of things is going to be a barrier.
Content is King. Start small, and actually shoot some videos! You can always improve your studio as you grow and as video becomes a more important part of your business.